Learn “How to Link JazzCash With Payoneer” to turn your international freelance transactions into a one-click solution.
If you are a Pakistani freelancer, then you can use the “Request a Payment” feature now directly from within the JazzCash app. This feature was not present before this partnership and that’s why freelancers face enormous problems while making their transactions.
This single feature streamlines your transactions by allowing you to raise payment requests to your clients. Using this, you can give your national and international clients multiple ways to pay you either using a credit card, local bank transfer, or e-check
In this article, we will get into the details to link your Payoneer with JazzCash, associated transaction fees, and other problems that you might face during this.
Table of Contents
How to Link JazzCash With Payoneer
By linking your Payoneer account with JazzCash, you can directly transfer money and manage your finances. To link your account, follow the steps below:
1. Download the Mobile App
- If you haven’t already downloaded the JazzCash mobile app, then download the app and register for a mobile account.
2. Log In to Your Account
- Open the JazzCash app and log in to your JazzCash mobile account.
- You need to enter your mobile number and MPIN to log in.
3. Access Payoneer
- On the home screen, tap on the “Payoneer” option.
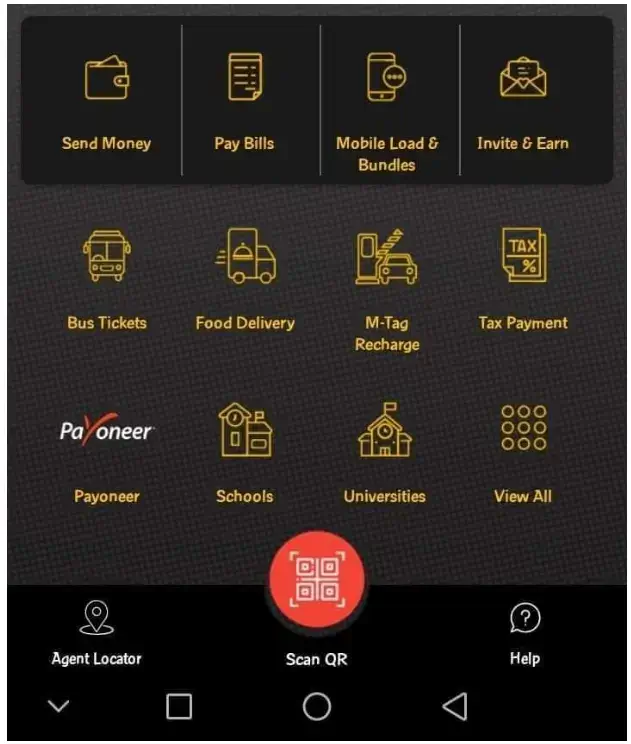
- If you don’t have a Payoneer account, then first sign up for it and then click on the link account option.
4. Link Your Account
- Click on the “Link Account” option.
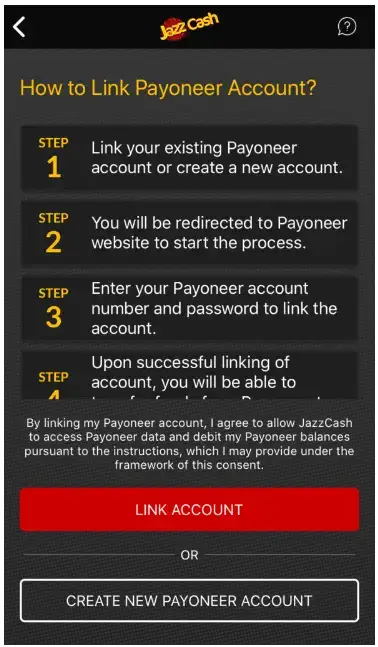
- You will be redirected to the Payoneer account login page.
5. Enter Credentials
- Enter your Payoneer account username and password.
- Click on “Sign In”.
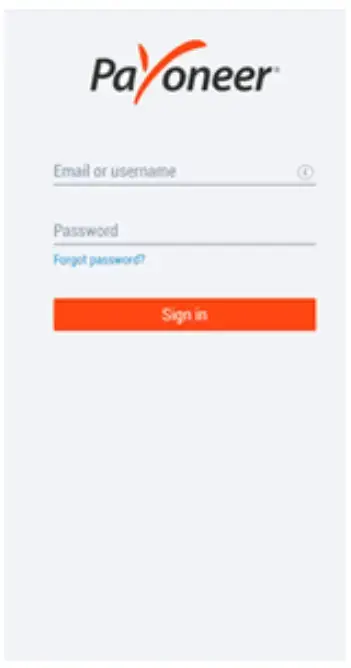
- After entering these details, your Payoneer account is now linked.
6. Verify and Confirm
- Go back to the JazzCash app dashboard and tap on “Payoneer”.
Your accounts are now linked. Now receive your payments directly into the JazzCash account, and utilize those funds for bill payments, mobile top-ups, and online purchases. You can also easily withdraw cash from JazzCash agents or ATMs.
You can even pay for Netflix with your JazzCash. Learn “How to Pay Netflix With JazzCash“.
Now, you might be interested in knowing about “How to Transfer Money From Payoneer to JazzCash”. Well, we have a simple and quick guide for this too.
How to Transfer Money From Payoneer to JazzCash
Follow these simple steps to transfer money from Payoneer to JazzCash:
1. Log In
- Open the JazzCash mobile app.
- Log in to your JazzCash Mobile Account using your credentials.
2. Access Payoneer
- From the home screen, tap on the “Payoneer” option.

3. Link Your Account
- If you haven’t already linked it, then first link your account here and then proceed further. Without linking both accounts, you will not be able to make any withdrawals.
4. Transfer Money
- Select the “Transfer Money” option.
- Enter the amount you want to transfer.
- Remember, the amount will be in dollars and the current dollar exchange rate will also be given under the blank.
- After entering the amount, click on “Next”.
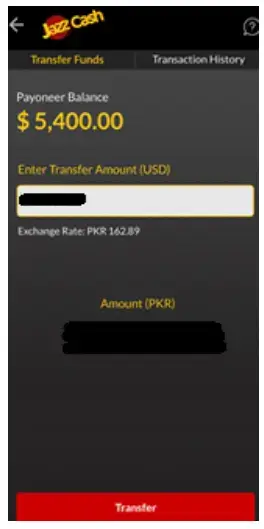
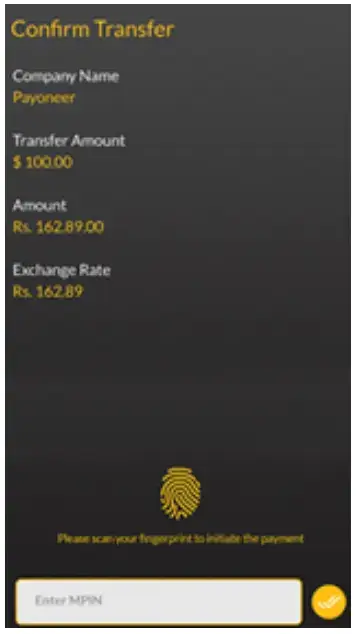
5. Verify and Confirm
- Review the transaction details thoroughly to avoid any mistakes.
- The app will ask you to enter your MPIN or use fingerprint verification to confirm and complete the money transfer process.
- A money transfer receipt will appear on the mobile screen and you will also receive a confirmation message from Jazz.
- You can use this money via the JazzCash Visa debit card or transfer this to your bank account.
Minimum Withdraw From Payoneer to JazzCash
The minimum withdrawal limit Payoneer offers is as low as $1.
It allows freelancers to access their earnings with ease, and the process is straightforward, as mentioned above.
Payoneer also puts a limit on the daily and monthly maximum withdrawals.
- Daily Limit: You can perform up to 10 transactions or withdraw a total of Rs. 150,000/-, whichever comes first, within a 24-hour period.
- Monthly Limit: Over a 30-day span, you can carry out a maximum of 30 transactions or withdraw a total of Rs. 500,000/- only, whichever limit is reached first.

Payoneer to JazzCash Fee
- JazzCash does not charge any fee for withdrawing funds from your Payoneer account.
- Freelancers can enjoy two free ATM cash withdrawals within the calendar month of receiving their freelance payment.
- Starting from the third cash withdrawal, JazzCash applies its standard charges. These fees vary based on the different transactions types.
- When withdrawing money from your Payoneer account, Payoneer charges a standard fee of 2% per transaction as the Payoneer to JazzCash transfer fee.
- This fee is to ensure secure and efficient cross-border transactions.
JazzCash Payoneer Not Working
If you are facing issues with linking Payoneer to JazzCash, you are not alone. Let’s find a solution for it:
Sometimes, you may encounter an error message while linking your account as “Unable to associate this funding source with your existing account”.
The root cause of this is that the new USD Debit cards issued by Payoneer do not support JazzCash. Additionally, your Payoneer account currently does not support transfers to your JazzCash account.
The solution steps to troubleshoot this problem are:
1. Create a Support Ticket with Payoneer
- Visit the Payoneer Support page.
- You need to create a support ticket to explain your situation to the support team.
- You may request them to disable your current Payoneer card and also to switch the USD card to a USD balance account.
2. Link Your Payoneer Account from JazzCash
- After your Payoneer card is disabled, open the JazzCash app.
- Link your Payoneer account from the JazzCash app using the method mentioned above
- It should now link without any issues.
3. Order a New Replacement Card
- Your new replacement card will take a few weeks to reach you.
- However, once you receive it, you’ll be able to withdraw your balance from Payoneer to JazzCash.
Here is a Bonus Tip for you.
- Order a JazzCash ATM card to withdraw money directly from the ATM or transfer it to your bank account.
Final Words
We have written a detailed guide from linking your accounts to withdrawing funds, and then troubleshooting your problems that you might face in your freelance journey. We suggest you to always visit the official websites for any changes and up-gradation.
